Settings
Configure task preferences, team management, custom statuses, timezone, and display options.
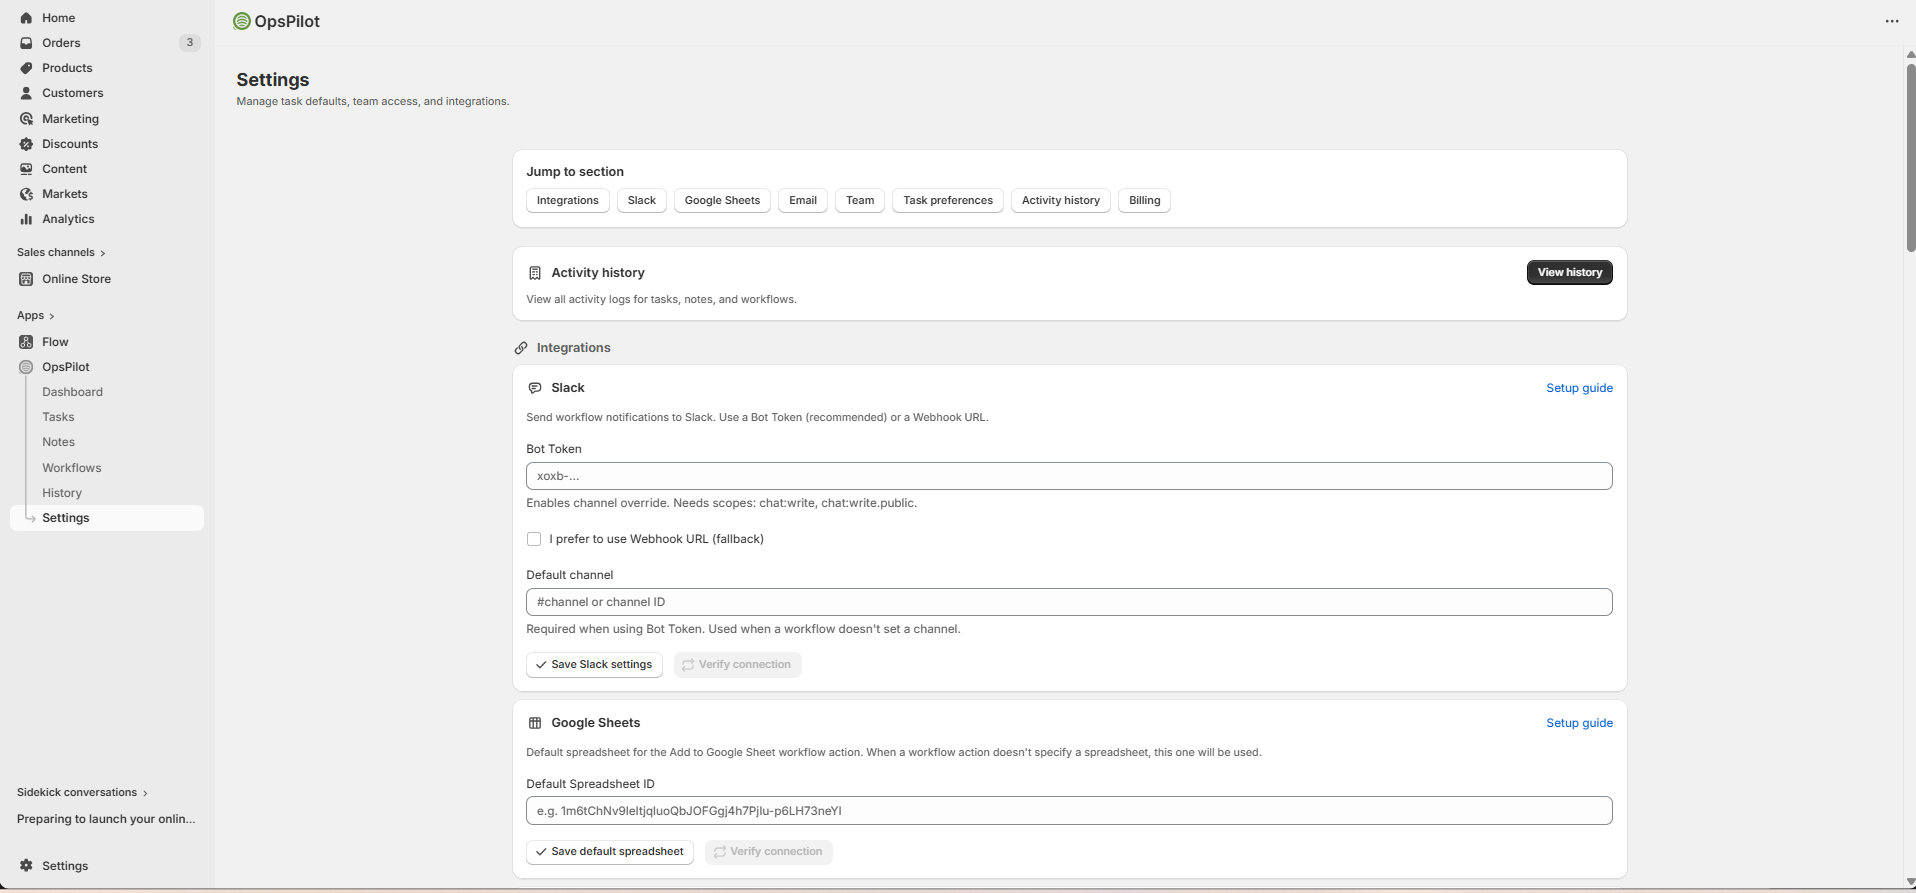
Jump-to-section bar with quick links to Integrations, Slack, Google Sheets, Email, Team, Task preferences, Activity history, and Billing. Each integration has a "Setup guide" link and Save/Verify buttons.
Task Preferences
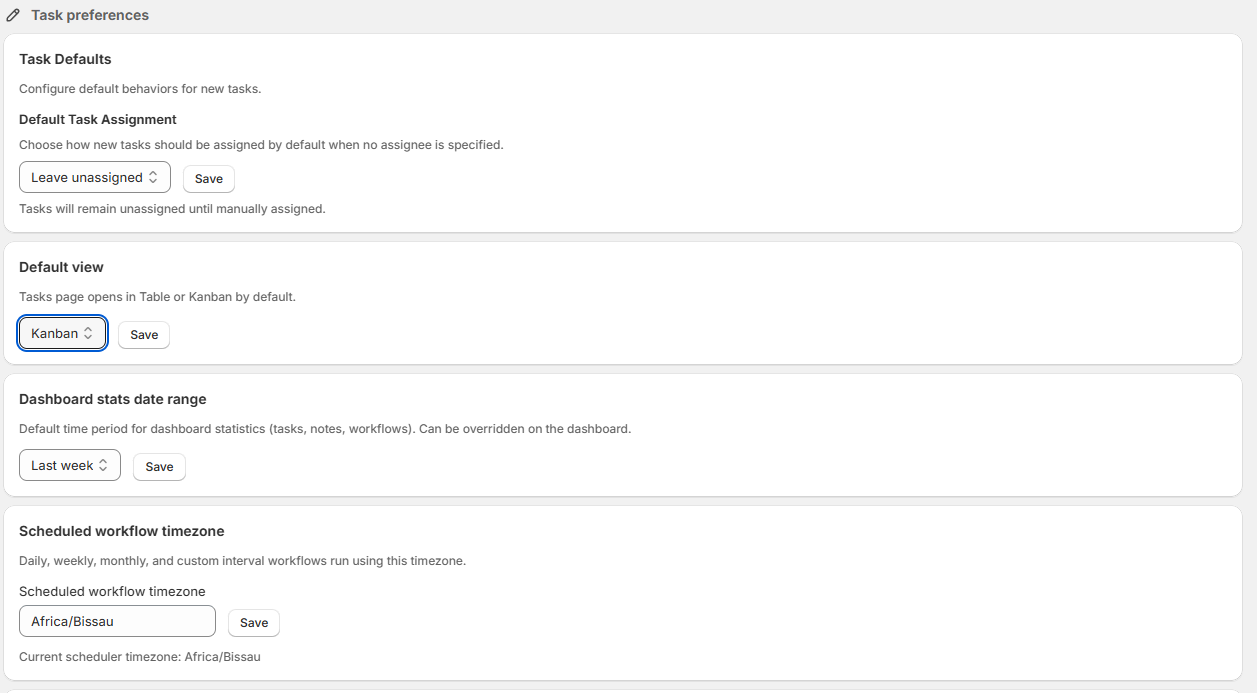
Default Task Assignment (Leave unassigned), Default View (Kanban), Dashboard stats date range (Last week), and Scheduled workflow timezone (Africa/Bissau).
Default Task Assignment
| Option | Behavior |
|---|---|
| Leave Unassigned | Tasks start with no assignee (default) |
| Assign to Shop Owner | Tasks are auto-assigned to the store owner |
Default View
| View | Description |
|---|---|
| Table | Spreadsheet-style list with sortable columns |
| Kanban | Visual board with drag-and-drop cards (default) |
Auto-Archive Completed Tasks
Automatically move completed tasks to "Archived" after a set period (e.g., 7 days, 14 days, 30 days). Keeps your active task list clean.

Enter the number of days, choose a period from the dropdown (or "Don't auto-archive"), then click Save.
Task Statuses
Customize the status options available for your tasks.
Creating Custom Statuses
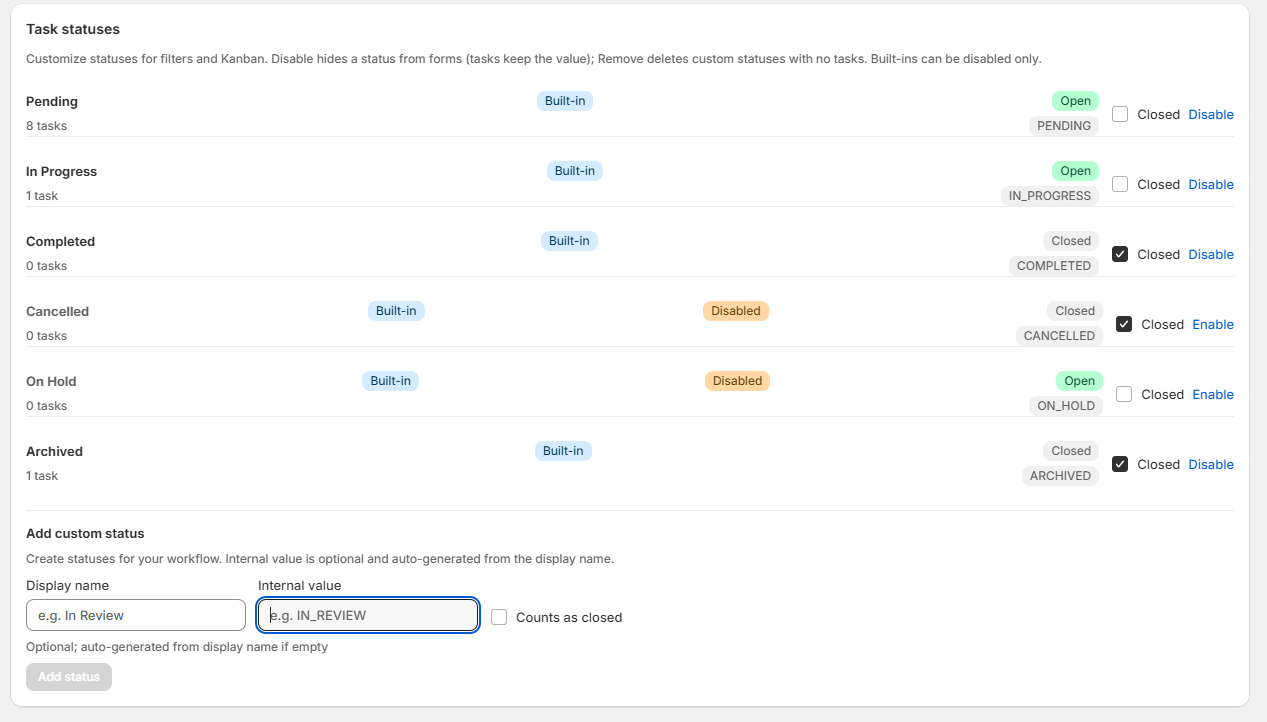
Built-in statuses (Pending, In Progress, Completed, Cancelled, On Hold, Archived) with Open/Closed badges, Enable/Disable toggles, task counts, and the "Add custom status" form at the bottom.
You can toggle
Dashboard Date Range
"Last week" dropdown with Save button — sets the default time period for dashboard statistics (tasks, notes, workflows).
| Option | Shows Data From |
|---|---|
| Today | Current day only |
| Last Week | Past 7 days (default) |
| Last Month | Past 30 days |
| Last 3 Months | Past 90 days |
Timezone
Scheduled workflow timezone dropdown set to "Africa/Bissau". Daily, weekly, monthly, and custom interval workflows run using this timezone.
Set the timezone used for scheduled workflows and time displays. OpsPilot detects your timezone automatically based on your Shopify settings, but you can override it here.
Team Management
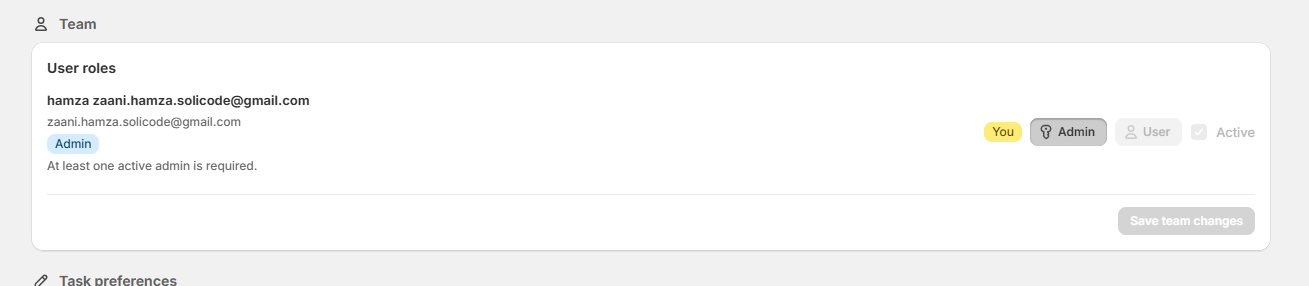
Each staff member listed with name, email, Admin/User role toggle, and Active checkbox. Click "Save team changes" to apply updates.
OpsPilot automatically detects your Shopify staff members. From the Team Management section you can:
- View all team members and their roles
- See task assignments per team member
- Manage who has access to the app
Roles & Permissions
Every team member is assigned one of two roles. Roles control what actions they can perform inside OpsPilot.
| Permission | Admin | User |
|---|---|---|
| View dashboard, notes, tasks | ✓ | ✓ |
| Create & edit notes | ✓ | ✓ |
| Create & update tasks | ✓ | ✓ |
| Change task status | ✓ | ✓ |
| Delete own tasks | ✓ | ✓ |
| Delete any task (bulk delete) | ✓ | ✗ |
| View workflows & run history | ✓ | ✓ |
| Create, edit, delete workflows | ✓ | ✗ |
| Manage Settings (team, statuses, integrations) | ✓ | ✗ |
| Manage team roles & activate/deactivate members | ✓ | ✗ |
| Configure integrations (Slack, Email, Sheets) | ✓ | ✗ |
| Manage billing & access | ✓ | ✗ |
Activating & Deactivating Members
Toggle the Active checkbox next to any team member to control whether they can log in. Deactivated members cannot access the app but their tasks and notes are preserved.